![]()
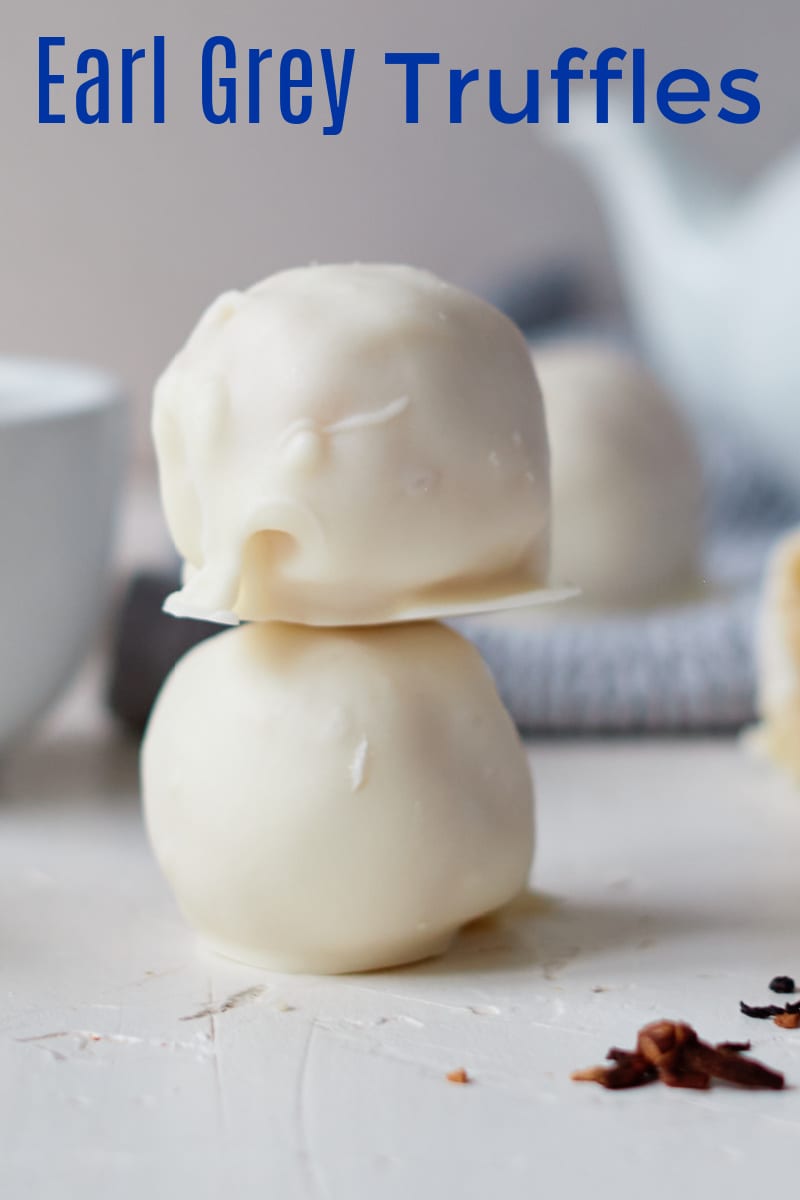
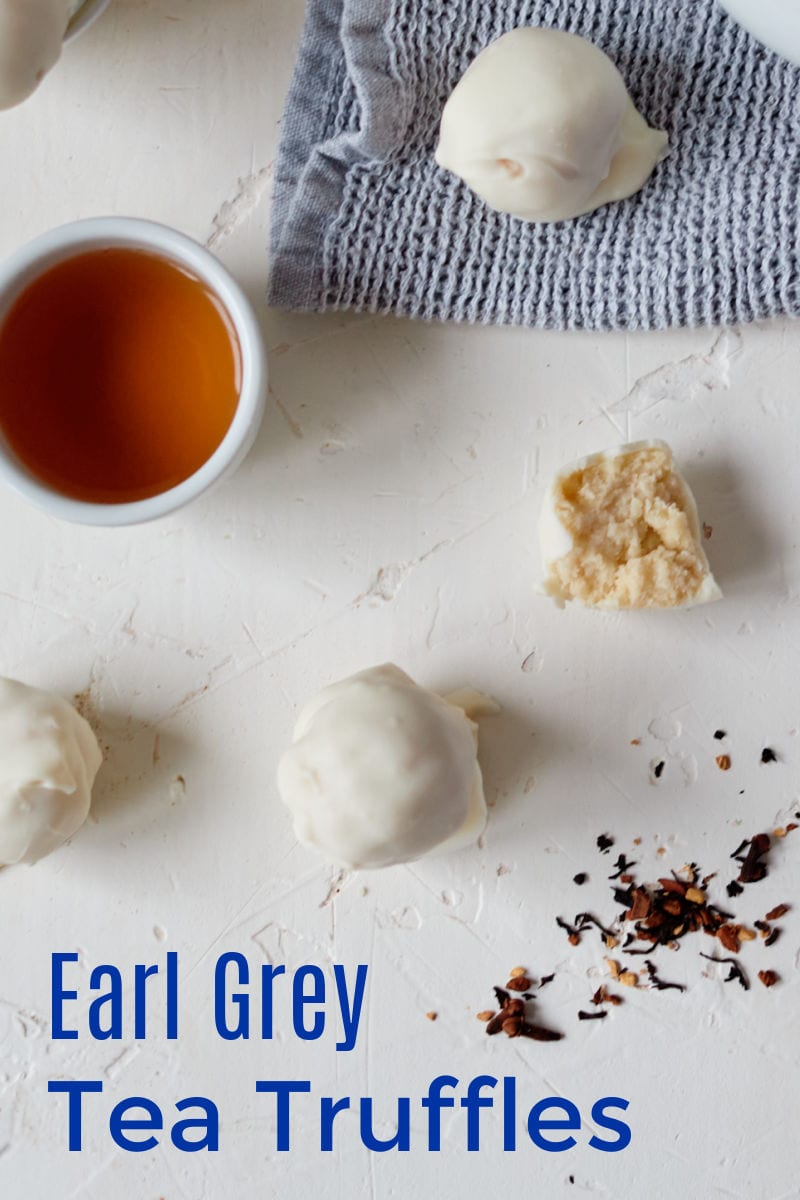
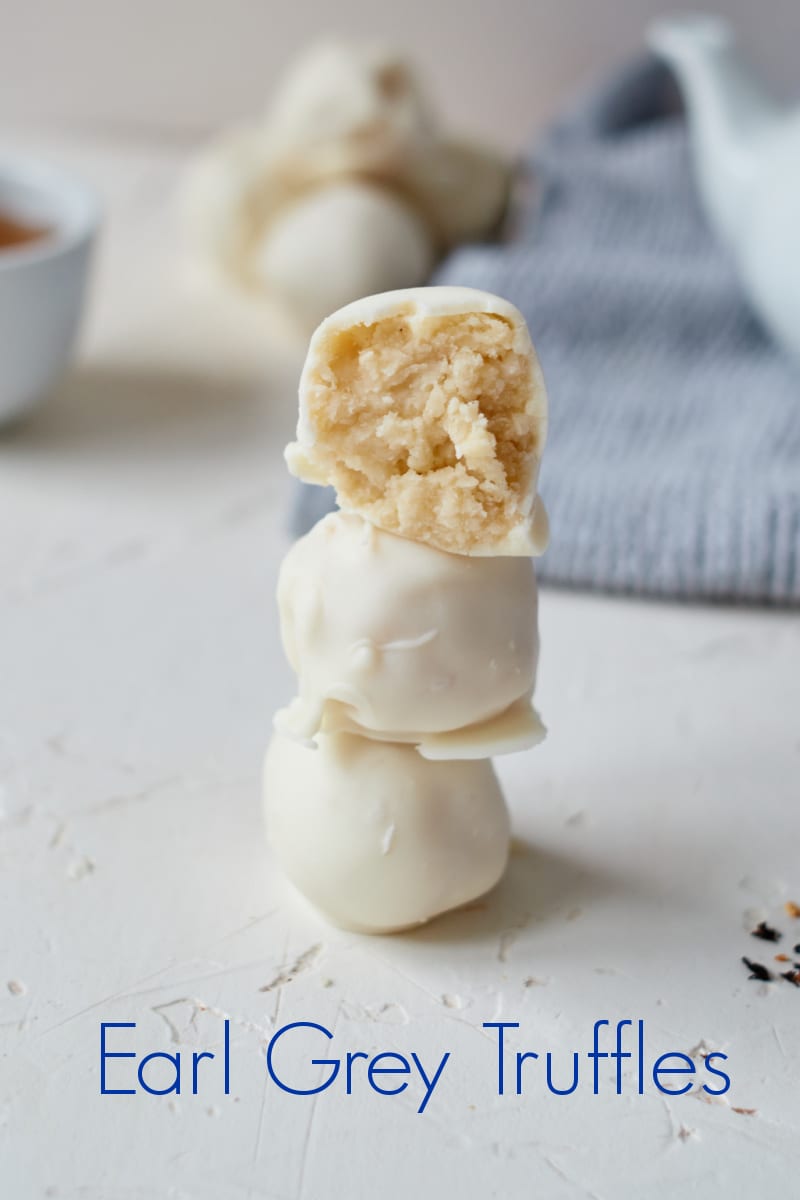
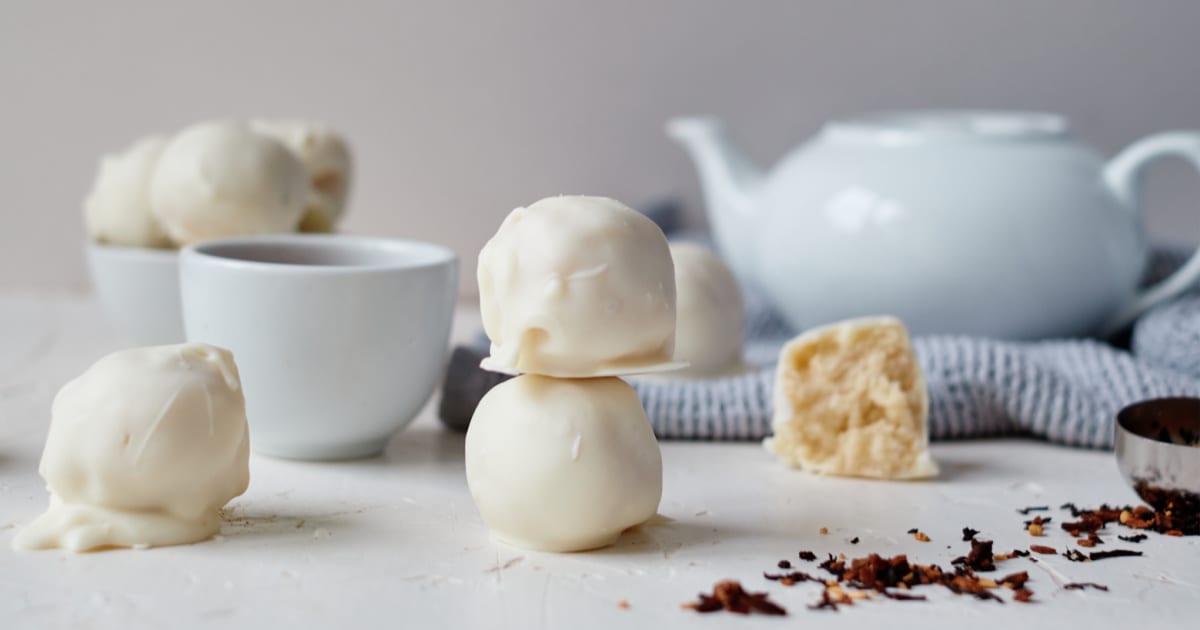
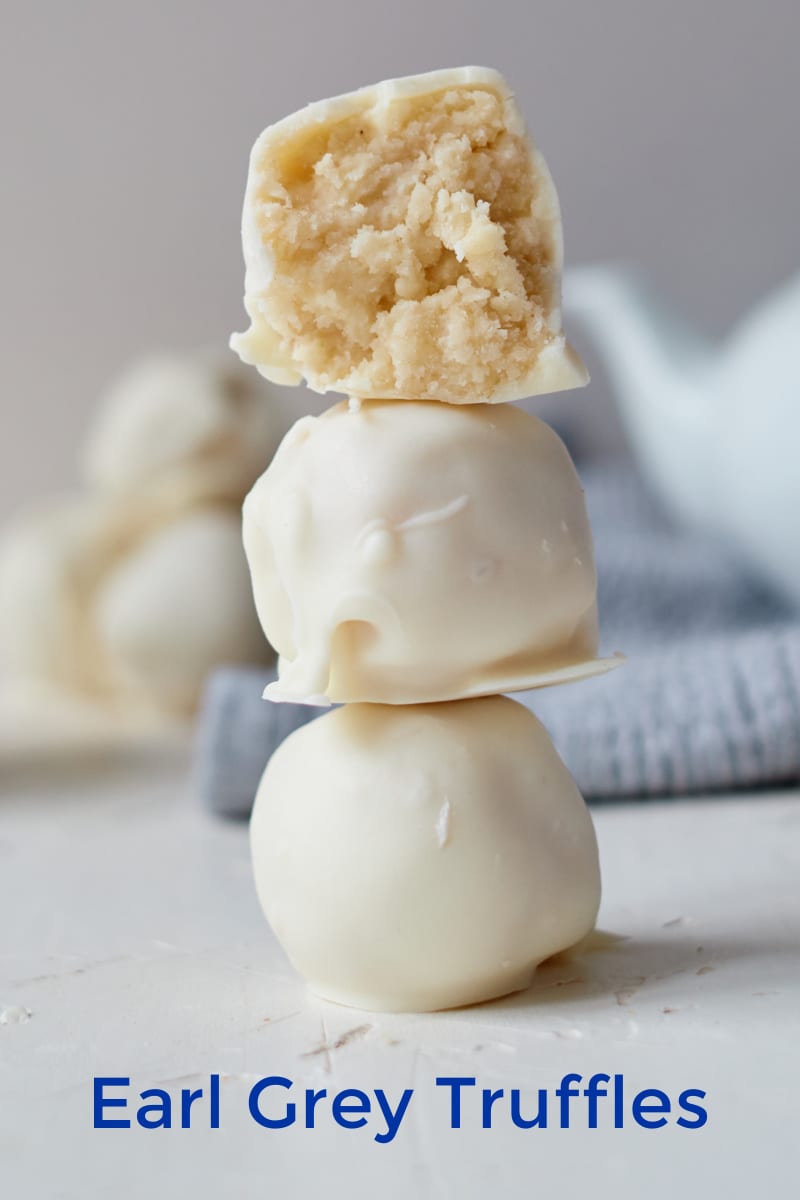
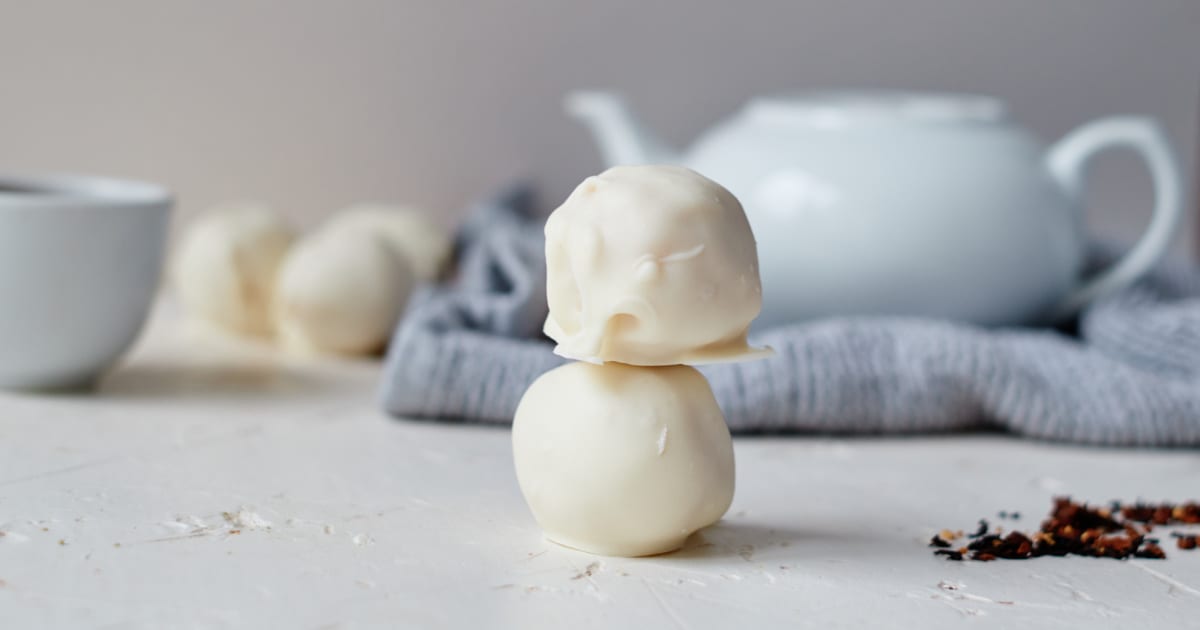
🫖Easy Homemade Truffles made with Earl Grey Tea & Sugar Cookies
Indulge in an elegant treat that is surprisingly simple to make!
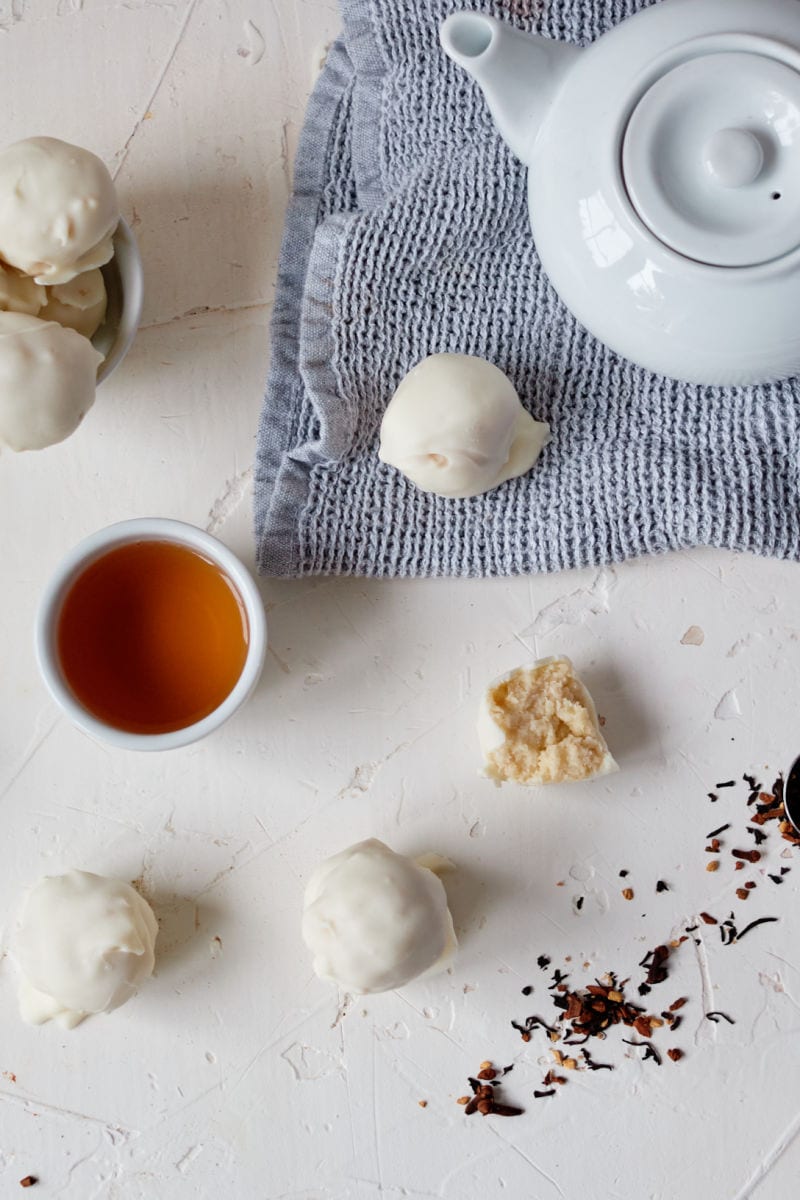
These Earl Grey Tea Truffles combine the rich, citrusy aroma of bergamot with creamy white chocolate for a truly sophisticated, aromatic dessert.
The best part?
This recipe is no-bake and requires minimal effort, thanks to the clever shortcut of using a crushed sugar cookie base.
You can achieve gourmet, intense tea flavor without ever turning on your oven!
Perfect for afternoon tea, a holiday platter, or an elegant homemade gift, these truffles are guaranteed to impress any chocolate and tea lover.
The Secret to Strong Tea Flavor & The Best Cookie Base ☕️
The unique, aromatic flavor of these truffles comes from two key ingredients—and knowing how to prepare them is key to success!
Maximizing the Earl Grey Flavor
- Brew It Strong: To ensure the classic bergamot notes of the Earl Grey cut through the rich chocolate and cream cheese, you must brew the tea extra strong. Use less water than usual, or steep the tea bags/loose leaf for at least 10 minutes (or longer!) before measuring out the required tablespoon.
- Use Quality Tea: While any Earl Grey works, choosing a quality tea that you enjoy drinking will make the final truffle flavor shine.
Choosing the Cookie Base
This recipe is labeled as “easy” because it uses crushed sugar cookies as the base!
You can use cookies that are homemade, baked from a tube, or simple store-bought cookies.
This saves significant prep time.
Why Sugar Cookies?
They provide a neutral, slightly sweet base that doesn’t overwhelm the delicate tea and chocolate flavors.
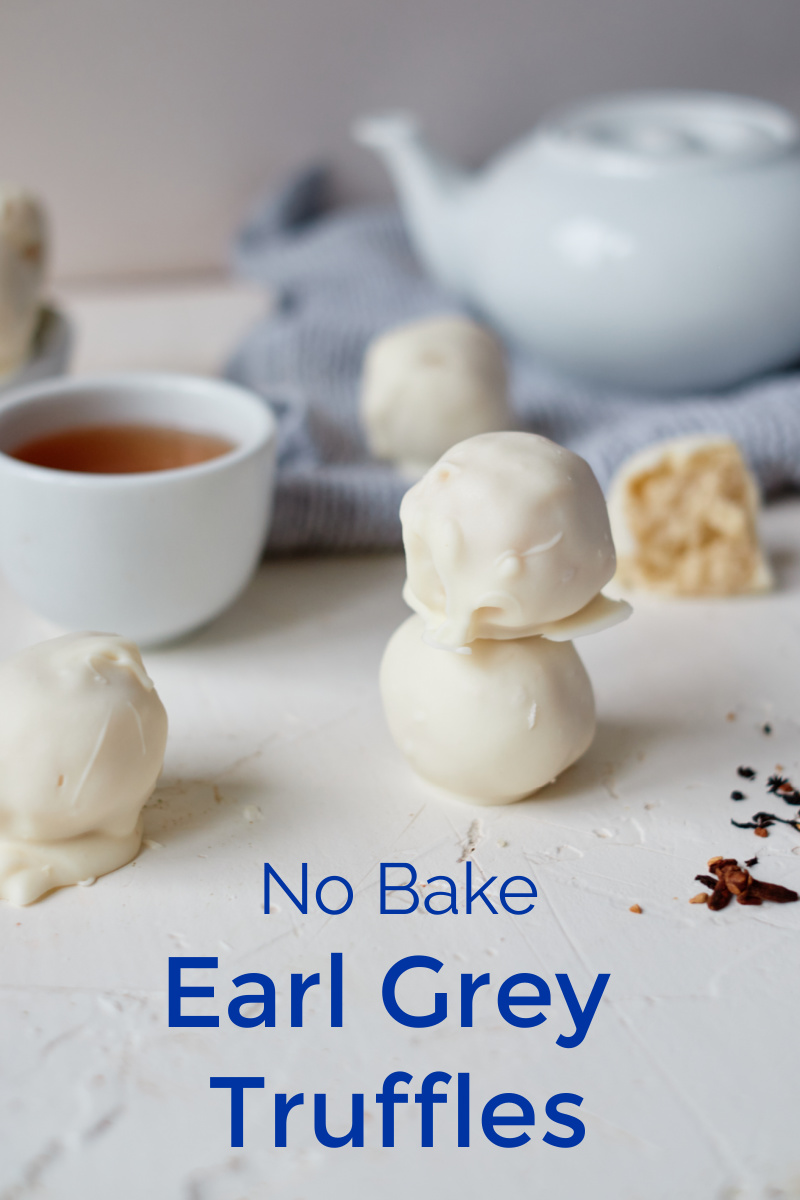
Earl Grey Tea Truffles Recipe 🫖
Prep time: 10 minutes ⏰
Total time: 3 hours
Serves: 12-15
🍪 Ingredients
- 24 Sugar Cookies (Store-bought or homemade)
- ½ cup White Frosting (Softened)
- 1 Tablespoon Very Strong Earl Grey Tea (The flavor star! ☕️)
- 8 oz package Cream Cheese (Softened)
- 1 Cup White Chocolate Chips (Or preferred coating)
- 1 Tablespoon Coconut Oil (For smooth dipping)
🥄 Supplies
- 1 Gallon Ziploc Bag & Rolling Pin (for crushing)
- Mixing Bowl & Mixer (optional)
- Parchment Paper & Baking Sheet
- Dipping Fork (Recommended for clean coating)
➡️ Instructions
- Crush the Cookies: Put the cookies (in batches) into a Ziploc bag and crush thoroughly using a rolling pin until you have fine crumbs. 🥣
- Mix the Base: Combine the crushed cookies, softened cream cheese, frosting, and the strong brewed tea in a mixing bowl. Mix until thoroughly combined and smooth.
- Shape & Chill: Line a baking sheet with parchment paper. Roll the batter into uniform balls and place them on the parchment, ensuring they are not touching. Refrigerate for at least 2 hours to set firmly. ❄️
- Melt Chocolate: Melt the white chocolate chips and coconut oil together until completely melted and lump-free.
- Dip & Coat: Using a dipping fork, submerge each chilled truffle ball into the melted chocolate. Tap off the excess coating and return the truffles to the parchment.
- Final Set: Refrigerate for about 10 minutes to allow the chocolate coating to finish setting.
- Serve & Store: Serve immediately, or store them in the refrigerator in an airtight container.
Gifting, Dipping, and Storage Tips 🎁
These truffles are elegant and delicious, making them perfect for parties or as a special homemade gift!
Perfect Dipping
- Smooth Chocolate: Adding a small amount of coconut oil (or shortening) to your melting chocolate is the secret to getting a smooth, thin coating that won’t seize or clump.
- Dipping Technique: Use a dipping fork or a regular dinner fork to lower the truffle into the melted chocolate. Tap the fork gently on the side of the bowl to let the excess chocolate drip off before placing it on the parchment paper.
- Decoration: For a professional look, sprinkle a little extra crushed tea leaves, sea salt, or a contrasting drizzle of dark chocolate over the truffles before the coating sets.
Storage & Gifting
- Shelf Life: Store the truffles in an airtight container in the refrigerator for up to one week.
- Freezing: You can freeze the finished truffles for up to one month. Thaw them in the refrigerator overnight before serving.
- Gifting: Truffles make a wonderful homemade present! Arrange them in a small decorative box with parchment paper or place them in miniature cupcake liners before packaging.
Ready to Enjoy a Taste of Luxury? 💎
These no-bake truffles are your secret weapon for easy, elegant entertaining.
Whether you pair them with a hot cup of tea or include them on a holiday dessert platter, the unique Earl Grey flavor is guaranteed to be a conversation starter.
Remember to check out the Gifting, Dipping, and Storage Tips section to ensure your truffles look (and stay) perfect!
More from Mama Likes To Cook
Check out the rest of my vegetarian recipes, so you can get more great ideas for baking, cooking, blending and juicing.
Truffles Recipes
- Earl Grey Tea
- Coconut Banana
- Peppermint Fudge
- Chocolate Banana
- Gluten-free Chocolate
- German Chocolate Cake
Tea Recipes
- Butterfly Blue Boba Milk Tea
- Cherry Hibiscus Sun Tea
- Instant Pot Ginger Peach Iced Tea
- Holiday Crockpot Tea
- Passion Iced Tea Lemonade
- Homemade Matcha Tea
- Blackberry Instant Pot Iced Tea
- Chai Drink Mix
- Coffee Milk Tea
Frosting Recipes
Cake Recipes
- Ding Dong Cake
- Chocolate Layer Cake
- Glazed Lemon Poppy Seed Cake
- Classic Homemade Yellow Cake
- Best Sheet Cake for Valentine’s Day
- Strawberry Crumb Cake
- Italian Chestnut Flour Cake
Cupcake Recipes
- Keto Matcha Cupcakes
- Unicorn Cupcakes
- Little Shop of Horrors Feed Me Seymour Cupcakes
- Spider Web Cupcakes
- Disney Red Velvet Cupcakes
- Muppets Miss Piggy Carrot Cupcakes
- Minnie Mouse Gluten-Free Cupcakes
Are you ready to have some delicious fun in the kitchen?
![]()